
Acrylic Printing Terms Explained
In large-format printing on acrylic, the most common industry terms you’ll see in news releases, product descriptions, and technical write-ups are tied to how ink adheres to the acrylic surface. A few of the most widely used ones include:
1. UV Printing / UV-Cured Ink
- This is by far the most common term.
- Acrylic is a non-porous surface, so traditional solvent or aqueous inks don’t bond well. Instead, UV ink is printed directly onto the acrylic and cured instantly with ultraviolet light.
- You’ll often see phrases like “direct-to-acrylic UV printing” or “UV-cured inks on acrylic substrates.”
2. Second-Surface Printing
- This refers to printing on the back side of a clear acrylic sheet so the image is viewed through the acrylic from the front.
- News and product descriptions often highlight this because it protects the ink layer from scratches and adds depth.
- Example phrase: “second-surface UV print on ¼″ clear acrylic.”
3. Direct-to-Substrate Printing
- A broader industry term meaning the ink is laid directly on the rigid material (in this case acrylic) rather than first being printed on vinyl and mounted.
- Acrylic is one of the flagship substrates used in direct-to-substrate UV printing.

We used a veriety of acrylic and adhesive vinyl to create this multi-dimensional wall graphic featuring color-white-color printing.
Digital Acrylic vs. Regular Acrylic
When people talk about “digital acrylic” vs “regular acrylic” in the context of large-format printing, they’re usually referring to differences in how images are applied to acrylic sheets (substrate) and how the acrylic itself is treated to accept printing. Here’s a breakdown of the terms, the benefits and drawbacks, and when you’d prefer one over the other:
- Regular acrylic (unmodified) refers to standard clear or colored acrylic sheets (PMMA, plexiglass) used for signage, displays, glazing, etc. It may be cut, polished, drilled, but as-is it doesn’t necessarily have any special surface treatment to accept inks well.
- Digital acrylic (or “printable acrylic,” “digitally printable acrylic”) refers to acrylic sheets that have been manufactured with a specially formulated surface or coating that allows UV or other inks to adhere reliably when printed directly onto the acrylic. These sheets are optimized for digital printing processes.
Because “digital acrylic” isn’t a material in itself but rather a surface-modified or print-compatible acrylic, the difference really comes down to ink adhesion, durability, optical clarity, and surface preparation.
Regular Acrylic vs. Digital Acrylic
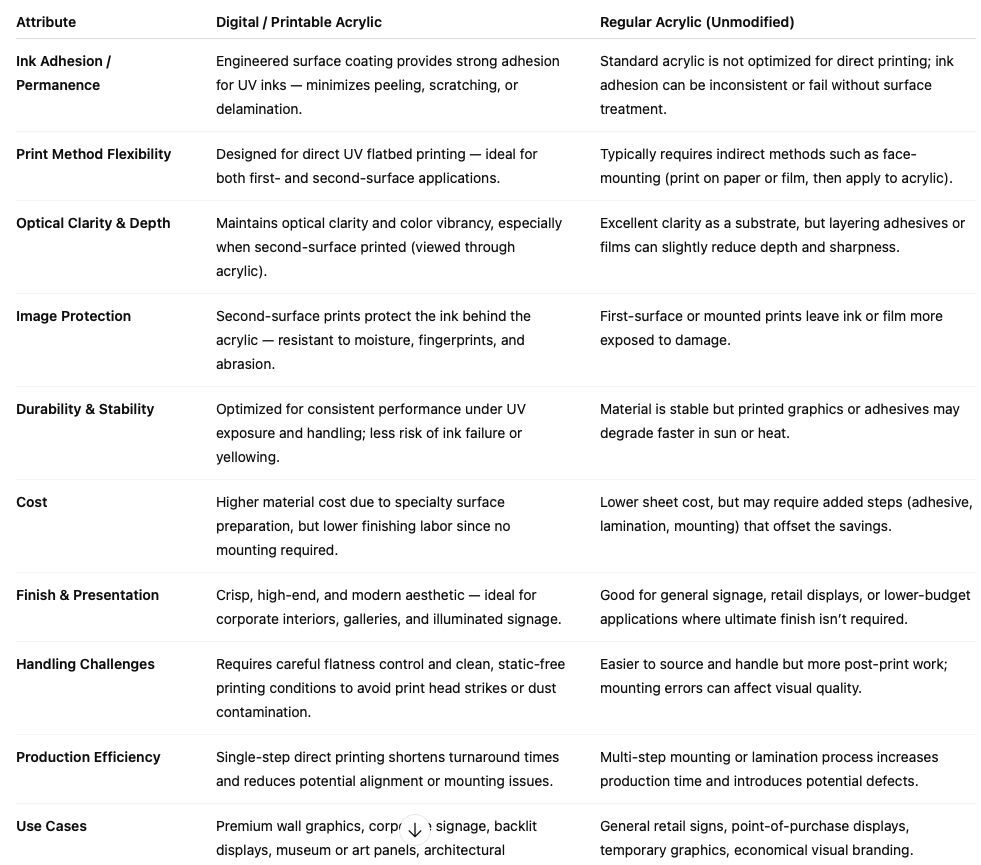
Summary:
- Digital Acrylic = optimized for direct UV printing, durable, high visual quality, and professional presentation.
- Regular Acrylic = versatile and lower-cost, but not suited for direct printing. Good for use with precision cutting and engraving applications.
Spot White (a.k.a. "Spotlight" or "Selective White"
What it means: White ink (or an extra layer of ink) is applied only in specific design areas.
Look: Lets you control transparency/opacity. You can leave parts of the acrylic clear, have some areas fully opaque, and others semi-transparent.
Uses: Backlit graphics, layered designs, product displays where you want certain areas to “pop” or glow.
Example: A retail acrylic display where a product photo has white ink under just the image portion, while the rest remains transparent.
Flood White (a.k.a. “Floodliight” or “Full White Backer”)
What it means: A solid, full layer of white ink printed behind the entire design.
Look: Ensures color vibrancy and opacity across the whole image — no light or transparency shows through.
Uses: Standard method for second-surface prints, backlit panels that need even illumination, signage that shouldn’t look translucent.
Example: An acrylic wall graphic with a flood white underlay so colors look solid even when mounted on a colored wall.
Summary:
First Surface = printed on the front face; ink is exposed.
Second Surface = printed on the back; ink is protected, viewed through acrylic.
Spotlight = selective white under specific areas.
Floodlight = full white underlay behind the entire image.
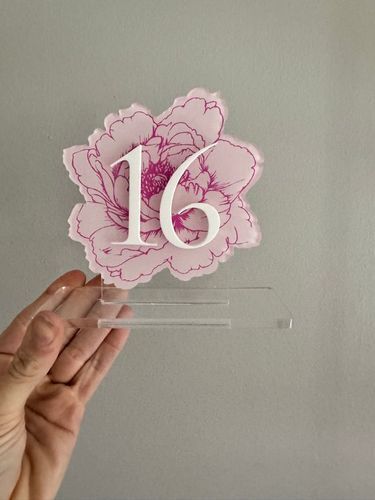
We printed the peony in using 2nd surface color white color technique on clear acrylic and the custom cut the number from white acrylic.
The Layers in Detail
- Color: CMYK (reversed)-Front-facing image=Viewed through substrate
- White: Opaque white ink-Blocks light, adds opacity-Hidden center layer
- Color: CMYK (right-reading)-Back-facing image-Visible from reverse side
By printing in this sequence, you achieve perfect alignment and equal density on both sides — without manually printing and mounting two separate sheets.